m (Minor cosmetic edit) |
m (Added alternative choice corrected grammar) |
||
| Line 10: | Line 10: | ||
On the surface, this is a simple fetch-the-artifact-mission, but there is a surprise waiting for you. As soon as you pick up the artifact and exit the tug, a [[Loner|Loner]] named [[Tuna]] will confront you and ask for the artifact. He claims that it has healing properties and that his friend needs it. If you refuse, he will ask you again a second time. |
On the surface, this is a simple fetch-the-artifact-mission, but there is a surprise waiting for you. As soon as you pick up the artifact and exit the tug, a [[Loner|Loner]] named [[Tuna]] will confront you and ask for the artifact. He claims that it has healing properties and that his friend needs it. If you refuse, he will ask you again a second time. |
||
| + | ==Choices== |
||
| − | |||
===Surrendering the artifact=== |
===Surrendering the artifact=== |
||
If you give him the artifact, he'll sprint to the [[Skadovsk]] and sell it to [[Beard]]. If you meet him at [[Skadovsk]] and don't threaten him, he'll give you 1500 RU to "cheer you up". You will fail this quest immediately after turning over the artifact and you will not be able to complete the [[Pioneer]] achievement. |
If you give him the artifact, he'll sprint to the [[Skadovsk]] and sell it to [[Beard]]. If you meet him at [[Skadovsk]] and don't threaten him, he'll give you 1500 RU to "cheer you up". You will fail this quest immediately after turning over the artifact and you will not be able to complete the [[Pioneer]] achievement. |
||
| Line 17: | Line 17: | ||
=== Fighting your way out=== |
=== Fighting your way out=== |
||
If you refuse to give him the artifact a second time, he will let you go only to be ambush by his two buddies seconds later, and demands you turn over the artifact. You can either give it up (holster your weapon and wait) - see outcome above - or fight your way out, which can be very dangerous, especially at higher difficulty levels. Tuna will melee hit you with his weapon, stunning you for seconds which always results in death. The strategy here to turn around and run towards Tuna and firing quickly before he has a chance to react and immediately hide back inside the tug. wait a few a little while and two other loner will move out of cover giving you an opportunity to take them out. |
If you refuse to give him the artifact a second time, he will let you go only to be ambush by his two buddies seconds later, and demands you turn over the artifact. You can either give it up (holster your weapon and wait) - see outcome above - or fight your way out, which can be very dangerous, especially at higher difficulty levels. Tuna will melee hit you with his weapon, stunning you for seconds which always results in death. The strategy here to turn around and run towards Tuna and firing quickly before he has a chance to react and immediately hide back inside the tug. wait a few a little while and two other loner will move out of cover giving you an opportunity to take them out. |
||
| + | |||
| + | === Gaining both rewards === |
||
| + | Prior to leaving the tugboat, drop the artifact and confront the extortionist. Follow the dialogue to hand over the artifact, this will disable the ambush. Once Tuna acquires the imaginary artifact he will sprint to [[Skadovsk]], it is imperative that you overtake him and award [[Beard]] the artifact before Tuna awards his imaginary one, otherwise you won't be able to trigger Beard's reward. Once Tuna takes up his regular position at the bar, you can head over to him and he'll award you his private compensation. |
||
| + | It is uncertain whether you can gain the [[Pioneer]] achievement if you follow this path. |
||
== Reward == |
== Reward == |
||
| Line 30: | Line 34: | ||
* The strange artifact is more or less useless since, all it does give off radiation only. It can't even be used as a flashlight, despite the fact it's supposed to emit a lot of light. |
* The strange artifact is more or less useless since, all it does give off radiation only. It can't even be used as a flashlight, despite the fact it's supposed to emit a lot of light. |
||
| − | * There is stash located inside the ship, underneath the artifact room. This stash can only the access from the outside of ship, near the ambush spot, by shooting the crate |
+ | * There is stash located inside the ship, underneath the artifact room. This stash can only the access from the outside of ship, near the ambush spot, by shooting the crate blocking the door. |
[[Category:Call of Pripyat missions]] |
[[Category:Call of Pripyat missions]] |
||
Revision as of 19:48, 2 August 2010
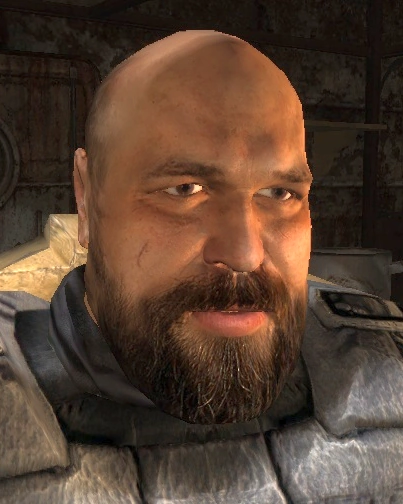
Beard
Yeah... Some stalkers reported a strange glow on the dredger at night - it's weird, even for the Zone. Go there and check it out. Just be careful and remember! The place is heavily irradiated, so take antirads with you. Don't be careless.
―[source/verification needed]
This quest is offered by Beard at Skadovsk which requires the player to travel to the Dredge Station in Zaton in order to recover the Anomalous Steering Wheel.
Summary
On the surface, this is a simple fetch-the-artifact-mission, but there is a surprise waiting for you. As soon as you pick up the artifact and exit the tug, a Loner named Tuna will confront you and ask for the artifact. He claims that it has healing properties and that his friend needs it. If you refuse, he will ask you again a second time.
Choices
Surrendering the artifact
If you give him the artifact, he'll sprint to the Skadovsk and sell it to Beard. If you meet him at Skadovsk and don't threaten him, he'll give you 1500 RU to "cheer you up". You will fail this quest immediately after turning over the artifact and you will not be able to complete the Pioneer achievement.
Fighting your way out
If you refuse to give him the artifact a second time, he will let you go only to be ambush by his two buddies seconds later, and demands you turn over the artifact. You can either give it up (holster your weapon and wait) - see outcome above - or fight your way out, which can be very dangerous, especially at higher difficulty levels. Tuna will melee hit you with his weapon, stunning you for seconds which always results in death. The strategy here to turn around and run towards Tuna and firing quickly before he has a chance to react and immediately hide back inside the tug. wait a few a little while and two other loner will move out of cover giving you an opportunity to take them out.
Gaining both rewards
Prior to leaving the tugboat, drop the artifact and confront the extortionist. Follow the dialogue to hand over the artifact, this will disable the ambush. Once Tuna acquires the imaginary artifact he will sprint to Skadovsk, it is imperative that you overtake him and award Beard the artifact before Tuna awards his imaginary one, otherwise you won't be able to trigger Beard's reward. Once Tuna takes up his regular position at the bar, you can head over to him and he'll award you his private compensation. It is uncertain whether you can gain the Pioneer achievement if you follow this path.
Reward
Notes
- For some reason, having the weapon in first slot out as they ambush you makes them shoot you as soon as the cut-scene ends. This is yet another reason not to trigger the ambush.
- There seems to be no way to avoid the encounter with Tuna, as soon as you jump inside of the station, the only way out is through him. There is an invisible wall which prevents you from jumping over the side railing of the ship.
- The strange artifact is more or less useless since, all it does give off radiation only. It can't even be used as a flashlight, despite the fact it's supposed to emit a lot of light.
- There is stash located inside the ship, underneath the artifact room. This stash can only the access from the outside of ship, near the ambush spot, by shooting the crate blocking the door.